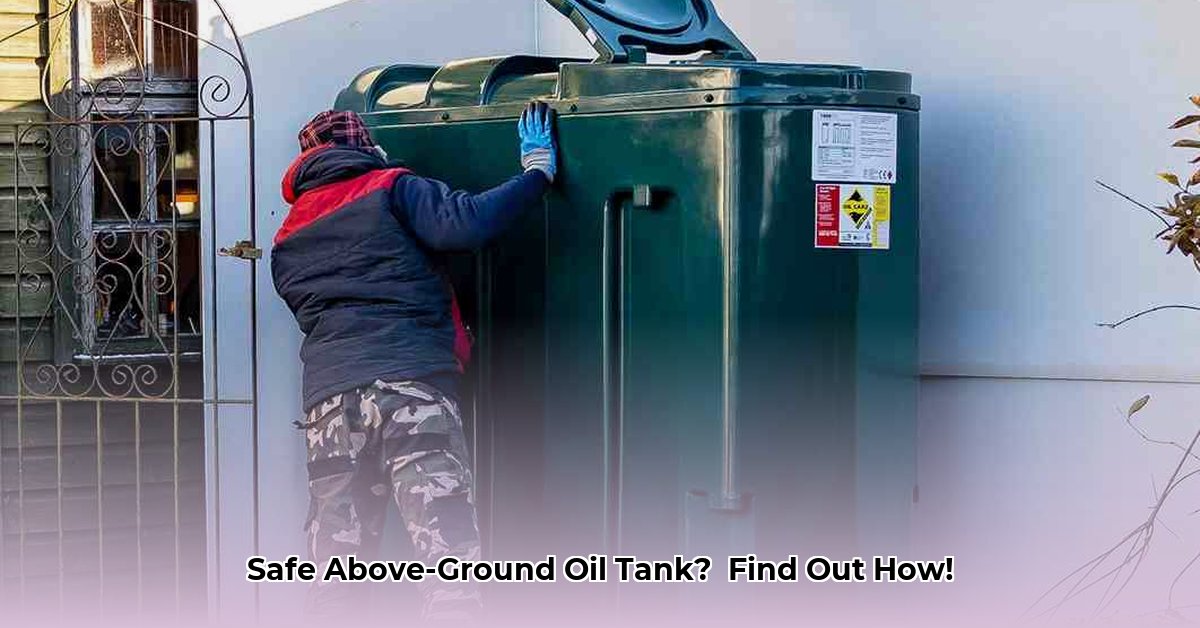
Installing an above-ground heating oil tank doesn’t need to be a headache! This comprehensive guide simplifies the process, providing step-by-step instructions applicable whether you’re a seasoned DIY enthusiast or a homeowner seeking clarity on the installation. From initial planning to long-term maintenance, consider this document your expert companion, ensuring a secure and efficient heating system. For regular oil deliveries, consider using a reliable service like this one.
Heating Oil Tank Installation: Your Step-by-Step Guide to a Safe and Secure System
Installing a heating oil tank can be manageable with the right approach. This guide simplifies the process into actionable steps, ensuring a seamless and safe installation – prioritizing your peace of mind. It is crucial to understand national, state, and local building codes and regulations prior to starting the project. Contact your local fire marshal or building inspector’s office to obtain this information.
Planning and Preparation: Setting Yourself Up for Success
Proper planning is vital before any installation begins.
- Secure Necessary Permits: Obtain required permits from your local building department, fire marshal, and homeowner’s association (if applicable) to ensure compliance and avoid future complications. Failure to obtain proper permits may lead to significant fines, project delays, or even mandated removal of the tank.
- Strategic Site Selection: Carefully consider indoor (protection from weather, easier leak detection) vs. outdoor (space limitations) placement. Indoor locations, ideally a basement, offer a stable temperature and protection from the elements, extending the tank’s lifespan. However, ensure the basement has adequate ventilation and is free from potential ignition sources. Outdoor tanks require a level, well-drained location away from direct sunlight and potential impact from vehicles or falling debris.
- Precise Tank Sizing: Determine the appropriate tank capacity based on average heating oil consumption, factoring in the size of your home, climate, and heating habits. Consult with a heating oil supplier to estimate your annual usage and select a tank size that meets your needs without excessive overcapacity. Common residential tank sizes range from 275 to 1000 gallons.
- Material Choice Matters: Select the right tank material (steel, fiberglass, or composite) based on cost, lifespan, and maintenance considerations. Steel tanks are durable but susceptible to corrosion, especially in humid environments. Fiberglass tanks are corrosion-resistant and lightweight but can be more expensive. Composite tanks offer a balance of durability, corrosion resistance, and cost. Double-walled tanks provide an extra layer of protection against leaks and spills, making them a safer and often code-required option.
Installation: A Step-by-Step Walkthrough
Remember, safety is paramount throughout the process.
- Groundwork Preparation: Create a solid, level foundation (concrete slab, gravel base) strong enough to support the tank’s weight when full. A concrete slab should be at least 4 inches thick and extend beyond the tank’s dimensions by at least 6 inches on all sides. A gravel base should be compacted and level, using crushed stone or pea gravel for optimal drainage. Ensure the foundation is free from sharp objects or debris that could damage the tank.
- Tank Placement: Carefully lower the tank onto the base, ensuring it’s level and plumb; use shims for adjustments. Verify the tank is positioned according to manufacturer’s instructions and local codes, maintaining proper clearances from walls, appliances, and other structures. Grounding the tank is also essential, especially for steel tanks, to prevent static electricity buildup. Connect a grounding wire from the tank to a grounding rod driven into the earth.
- Fuel Line Hookup: Connect fuel lines with correct fittings and high-quality sealant (such as Teflon tape or pipe dope), meticulously checking for leaks after each connection. Use copper or flexible oil-resistant tubing that meets UL standards. Install a shut-off valve near the tank for emergency fuel stoppage. Protect fuel lines from physical damage by using protective sleeves or routing them along walls and ceilings.
- Venting System Installation: Install the vent pipe according to local codes, ensuring proper size (typically 1.25 to 2 inches in diameter) and extension outside, away from windows, doors, and air intakes. The vent pipe should terminate at least 2 feet above the highest point of the roof and be fitted with a weather-resistant vent cap to prevent rain and debris from entering. Avoid sharp bends or restrictions in the vent pipe, as they can impede airflow and cause pressure buildup.
- Spill Prevention System: Install a spill containment system (secondary containment pan or berm) and keep absorbent materials handy. A spill containment pan should be large enough to hold the entire capacity of the tank in case of a leak or spill. A berm, constructed of concrete or other impermeable material, can be used to contain spills outdoors. Keep absorbent pads, granules, and booms readily available to clean up any spills.
- Comprehensive Leak Check: Perform a thorough leak test of all connections and the venting system; schedule a final inspection by a qualified professional. Use a leak detection solution or soapy water to check for leaks at all fittings and connections. Pressurize the tank with air and monitor the pressure gauge for any drop, indicating a leak. Have a licensed heating technician inspect the installation to ensure compliance with all codes and regulations.
Safety: Always Your First Priority
Prioritize safety when handling heating oil. Always wear safety glasses, gloves, and sturdy work boots. Ensure ample ventilation, prohibiting smoking or open flames near the tank. Keep a readily available fire extinguisher (Class B) and a spill kit on hand. Never attempt to repair a leaking tank yourself; contact a qualified professional immediately.
Maintenance and Long-Term Care: Keeping Your System Running Smoothly
Regular maintenance extends the life and efficiency of your heating oil tank. Schedule annual inspections by a qualified technician to check for corrosion, leaks, and other potential problems. Check oil levels regularly and maintain a clean surrounding area, free from debris and vegetation. Promptly address minor issues to prevent escalation. Replace fuel filters annually to ensure optimal fuel flow and prevent burner clogs. Consider adding a fuel stabilizer to prevent sludge buildup and extend fuel life.
Troubleshooting and Frequently Asked Questions (FAQs)
- Leak Detection: Immediately shut off the fuel supply and contact a qualified technician for repair and cleanup if you notice a leak. Do not attempt to contain or clean up the spill yourself if you are not properly trained. Contact your local fire department and environmental protection agency to report the spill.
- Inspection Frequency: Annual inspections are strongly recommended to ensure optimal operation and identify potential problems before they become major issues. More frequent inspections may be necessary in areas with harsh climates or older tanks.
- Tank Sizing: Consult a heating professional for advice on appropriate tank size based on your heating needs, home size, climate, and heating habits.
- Faulty Vent Signs: Hissing sounds or pressure buildup in the tank may indicate venting problems requiring immediate attention. Inspect the vent pipe for obstructions or damage. Contact a qualified technician to diagnose and repair the venting system.
Things to Consider and Next Steps
Local building codes and regulations vary; check with local authorities for specific requirements. NFPA 31 is a national standard for the installation of oil-burning equipment, but local codes may have additional requirements. If unsure, consult a qualified heating professional to guarantee a safe and compliant installation. Prioritize your family’s safety and seek professional help when necessary.
How to Choose the Best Above Ground Oil Tank Material for My Climate
Selecting the correct above-ground oil tank material ensures safety and longevity, adapting to your local climate. Consider the impact of weather conditions on tank materials.
Key Takeaways:
- Proper material selection is crucial for safety and longevity.
- Local climate conditions significantly impact the choice of tank materials.
- Steel and double-walled tanks can offer robust protection against corrosion.
- Compliance with local building codes is essential before starting any installation.
- Regular inspections and maintenance are key to preventing costly repairs and environmental risks.
Planning & Preparation: Laying the Groundwork for a Safe Installation
Thorough planning is essential for a safe and compliant installation:
- Secure the Necessary Permits: Obtain required permits from local authorities, ensuring compliance with safety standards. Check with your local building department and fire marshal for permit requirements.
- Strategic Site Selection: Choose an accessible location for deliveries, away from structures and ignition sources, with proper drainage. Avoid placing the tank near windows, doors, or air intakes. Ensure the location is protected from potential impact from vehicles or falling objects.
- Precise Tank Sizing: Determine the appropriate tank size based on heating needs and usage patterns. Consult with a heating oil supplier to estimate your annual consumption and select a tank size that meets your needs without being excessively large.
- Material Selection: Base your material choice (steel, double-walled, or specialized) on climate conditions, considering protection against freezing and corrosion. In cold climates, consider a double-walled tank with insulation to prevent fuel gelling. In coastal areas, choose a corrosion-resistant material like fiberglass or composite.
Installation Steps: A Detailed Approach to a Safe Installation
- Foundation Preparation: Create a level and stable base, ideally a concrete slab, ensuring proper support. The concrete slab should be at least 4 inches thick and extend beyond the tank’s dimensions by at least 6 inches on all sides.
- Tank Placement: Carefully place the tank on its base, ensuring it’s level and secure. Use shims to adjust the tank’s level if necessary. Ensure the tank is properly supported to prevent movement or settling.
- Secure Connections:
- Unlock Your Future: Community Colleges in Florida with Childhood Education Programs – Your Affordable Path - September 14, 2025
- Unlock Futures: Catawba College Growth Strategy Insights 2025 - September 14, 2025
- Your Complete Guide to Eastfield Community College | 2025 Programs & Insights - September 14, 2025


![Fast Track Your Legal Career: Broome Community College Paralegal Studies AAS [2025 Guide] broome_community_college_paralegal_studies_edited](https://baufinanzierung-ausland.de/wp-content/uploads/2025/08/broome_community_college_paralegal_studies_edited-150x150.jpg)


